Underwater Camera Housing Maintenance
Maintenance is one of the duties that almost every underwater photographer wishes they didn’t have to do. However, it’s the very people that don’t do it that are the ones that will sooner or later suffer a problem with their equipment.
If done correctly maintenance is just a minor inconvenience before or after a dive, but if ignored it can lead to a catastrophic flood. Housing floods, for those readers that haven’t suffered one yet, are what turns the most positive thinking underwater photographer, into a dribbling, incoherent state of depression.
You’ve probably seen one of these flood victims on at least one of your previous dive trips. It’s that person sitting in the corner nursing a salty camera and mumbling about service and ‘O’ rings to anyone that comes within earshot. Everyone avoids that person, and with good reason; as the latest studies clearly show that camera floods are highly contagious.
So what can you do to increase the life of your housing and minimize the chance of becoming another flood victim?
By following these simple maintenance steps you will go a long-way towards extending the life of your housing and preventing a lethal dose of this deadly disease. Housing Maintenance falls into three distinct categories:
is performed while you assemble your equipment before a dive. It’s preferable to do this at home or in your hotel room, not on a rocking and rolling dive boat or on a sandy beach.
For most housings, the Main Body (rear door) ‘O’ Ring should already be removed from your housing (see Post Dive Maintenance below). If it isn’t, then remove it now for cleaning, prior to assembly.
If done correctly maintenance is just a minor inconvenience before or after a dive, but if ignored it can lead to a catastrophic flood. Housing floods, for those readers that haven’t suffered one yet, are what turns the most positive thinking underwater photographer, into a dribbling, incoherent state of depression.
You’ve probably seen one of these flood victims on at least one of your previous dive trips. It’s that person sitting in the corner nursing a salty camera and mumbling about service and ‘O’ rings to anyone that comes within earshot. Everyone avoids that person, and with good reason; as the latest studies clearly show that camera floods are highly contagious.
So what can you do to increase the life of your housing and minimize the chance of becoming another flood victim?
By following these simple maintenance steps you will go a long-way towards extending the life of your housing and preventing a lethal dose of this deadly disease. Housing Maintenance falls into three distinct categories:
- Pre-Dive Maintenance involves small checks and cleaning prior to a dive. These are simple, easy to conduct procedures that are carried-out while you assemble your camera equipment. It will probably take between 1-5 minutes depending on the complexity of your equipment.
- Post-Dive Maintenance is carried-out while stripping down your camera gear for storage, usually once you are at home, and will take between 5-10 minutes.
- Long Term Maintenance is usually carried out annually or bi-annually and is best carried-out by the equipment manufacturer or their service agent.
is performed while you assemble your equipment before a dive. It’s preferable to do this at home or in your hotel room, not on a rocking and rolling dive boat or on a sandy beach.
- If you are in a hot humid country, try to assemble your camera/housing in an air conditioned room, preferably with the camera removed from the housing overnight and the housing kept open overnight. This way both the camera and housing are in the driest (least humid) condition when being assembled. Don’t take the camera or housing outside until it’s fully assembled, as the camera will fog-up almost immediately upon exposure to the warmer/humid air outside of the air conditioned room.
- If you are in a cooler/dryer climate, then assemble your camera & housing inside, away from dust and sand.
For most housings, the Main Body (rear door) ‘O’ Ring should already be removed from your housing (see Post Dive Maintenance below). If it isn’t, then remove it now for cleaning, prior to assembly.
Let's start with some photos on cleaning your Main Body O Ring
(photos show a compact camera, but these instructions apply to most styles of housings)
|

|
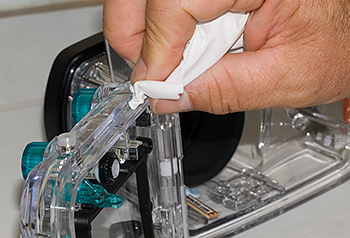
Hold the ‘O’ Ring with your left hand and then by pushing with a tissue in your right hand, the ‘O’ Ring will generally then become loose in the groove.
Once it has loosened enough, lift the ‘O’ Ring from its groove.
|
This is a close-up photo of the ‘O’ Ring in my friend's housing after only one shore dive in a black sand area. This ‘O’ Ring has to be removed, cleaned and then re-lubed before using the housing.
|
|

|
|
Clean the ‘O’ Ring groove in the housing rear door and in the front port (if fitted with a removable port) by wiping it with a piece of clean tissue paper, lens paper or microfiber cloth. Push the tissue into the groove, so it forms the square shape of the groove.
|
Now, in one continuous motion, wipe around the entire groove until the entire circumference has been wiped.
|
|
|
|
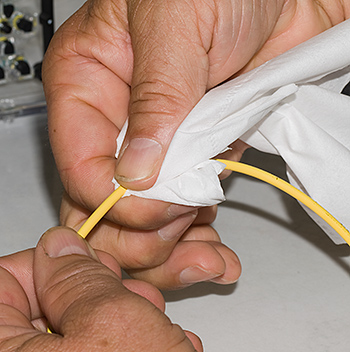
Wrap the ‘O’ Ring in tissue and pull the ‘O’ Ring through the tissue. This wipes the ‘O’ Ring clean as it passes through the tissue.
|
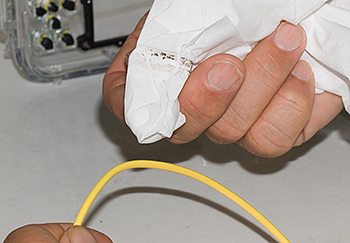
Look what came off my friend's ‘O’ Ring - lots of black sand! Shore divng in sandy area's is a sure way to get sand in your O rings. When there are waves at the entry/exit point of your dive, there will always be lots of sand in suspension. Ready to settle on your camera housing and find it's way into O rings, buttons and dials!
|
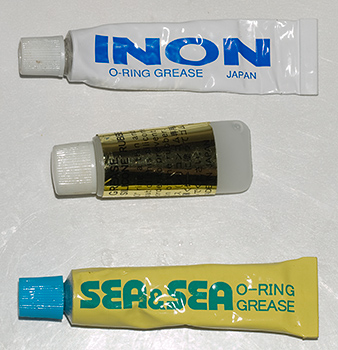
Apply a small amount of the ‘O’ ring grease supplied with your housing to the main body ‘O’ ring(s). Use just enough grease to make the ‘O’ ring(s) shiny – NOT so much that there are visible lumps of grease – It is possible to over-grease the O-ring!
|
WARNING: DO NOT USE ANOTHER MANUFACTURERS GREASE ON SILICON O RINGS, AS EACH O RING REQUIRES SPECIFIC GREASE. DON'T MIX AND MATCH!
EACH TYPE OF SILICON MAY NOT BE COMPATIBLE |
At the same time you are applying the ‘O’ Ring grease, feel the ‘O’ Ring for nicks, cuts or sand particles. It’s amazing how much your fingers can feel when lubing the ‘O’ Ring. If you feel any imperfections, check them out with a magnifier before installing the ‘O’ Ring. If in doubt replace it first-- ‘O’ Rings are very cheap in comparison to flooded cameras or strobes!
• Install the camera in the housing, checking that it is seated correctly.
• If your camera set-up uses the camera’s internal flash for lighting or if it uses the camera’s internal flash to fire an external strobe, then you need to install a Desiccant Pack inside of the housing before closing it.
• Install the camera in the housing, checking that it is seated correctly.
• If your camera set-up uses the camera’s internal flash for lighting or if it uses the camera’s internal flash to fire an external strobe, then you need to install a Desiccant Pack inside of the housing before closing it.
|

|
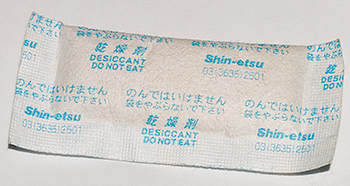
Dessicant Packs absorb moisture, they come in various shapes and sizes. Find a brand that fits easily into your housing.
This will save your camera from premature failure due to moisture forming inside the housing. When the internal strobe fires underwater it releases a lot of heat into the confined space of the housing. This heat causes moisture from the trapped air in the housing to condense on the camera and inside of the housing. The Desiccant Pack will help absorb most of this condensation. (The Desiccant Pack can later be heated in an oven to remove the condensation for re-use).
• Make sure the Desiccant Pack is not interfering with the ‘O’ ring sealing surface as you close the back of the housing. Also ensure that it is not stopping the camera from seating correctly in the housing, as this may stop the housing rear door from closing tightly.
• Make sure the Desiccant Pack is not interfering with the ‘O’ ring sealing surface as you close the back of the housing. Also ensure that it is not stopping the camera from seating correctly in the housing, as this may stop the housing rear door from closing tightly.
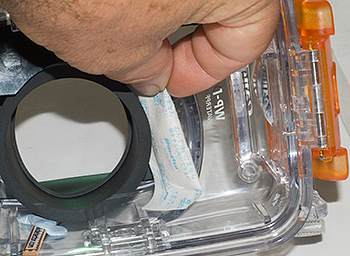
Find a location where the Dessicant Pack does not interfere with your camera fitting into its housing, nor interferes with the ‘O’ Ring sealing correctly.
|
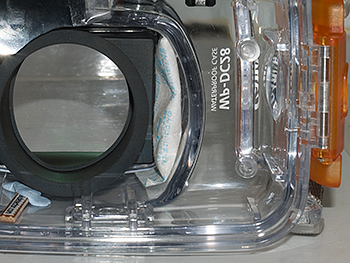
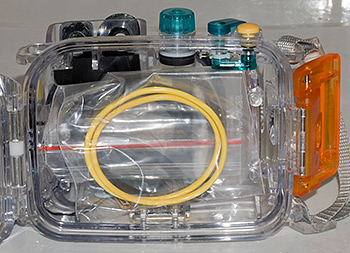
In this Canon housing, the Dessicant Pack sits easily alongside the lens, the rubber surrounding holds the Dessicant Pack away from the actual lens.
|
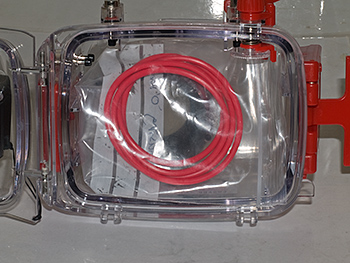
With clear acrylic housings you can visually check that the ‘O’ Ring is seated correctly in the groove by looking through the side of the housing BEFORE entering the water. The ‘O’ Ring should contact the housing evenly over its entire circumference – it appears slightly darker where it is sealing. Most leaks are caused by the ‘O’ ring not being seated correctly or dirt in the ‘O’ ring groove.
• You are now ready to assemble strobes. These are treated the same way as the camera housing: clean the ‘O’ Ring groove, clean the ‘O’ Ring, lubricate the ‘O’ Ring lightly, and install the ‘O’ Ring. Install batteries, ensuring correct polarity (+ positive and – negative). Test that the strobe ready light is operating before connecting to the housing.
• If you use external strobes you will now be fitting your base plate and strobe arms. Test fire the camera before entering the water, this ensures that everything is functioning correctly.
• Now you are ready to enter the water. Keep an eye on the housing when first entering the water and descending. Most leaks occur within the first few meters and you may be able to save the camera if you see a leak early enough.
Post Dive Maintenance
Post-Dive Maintenance is mostly carried out once you are back in your hotel room or in your boat cabin, or home. It isn’t carried-out on the rolling deck of a boat or on a beach. That said, there are some very basic things that should be done between dives and as soon as you are out of the water.
• Rinse your camera in fresh water upon surfacing from each dive. If there is no rinse tank on a boat, or you are shore diving with no rinse tank, bring along an old towel that can be dunked in the seawater. Then between dives, wrap your housing in the towel and keep it out of the sun in order to keep the housing cool and damp. This will prevent salt from drying-out and crystallizing on housing controls, which damages the ‘O’ Rings the next time you press a button and can cause a flood.
• Make sure your camera equipment is not in the dive boat rinse tank along with Harry Heavy-Hand’s half-ton alloy housing with 4 strobes attached, squashing your pocket sized compact camera underneath it. NOTE: Most dive boats have a Harry Heavy-Hands onboard!
• When you are finished diving for the day, give your housing another good rinse. Preferably leave it to soak for as long as possible. Operate each of the control buttons dials switches while in the freshwater. This will help dissolve any salt crystals inside the control button shafts and other areas. Remember to not leave your housing in a public rinse bucket, as other cameras may knock it around. More floods happen in rinse tanks than anywhere else!
|
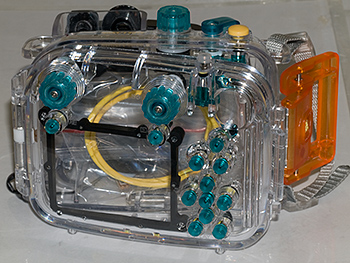
Push each and every control and turn every dial
while your housing is submerged in a fresh water rinse tank |
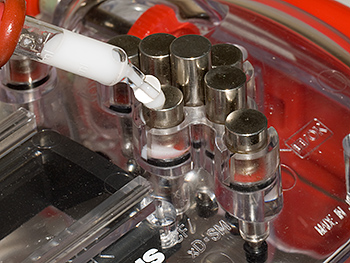
If you are not going to dive with the housing for a week or more then an additional step of simple maintenance is to lubricate each control button and dial shaft with one drop of SiliconPump (available from your local dive store or visit www.mcnett.com). Please confirm with your housing manufacturer or retailer that this is safe for your particular brand of housing.
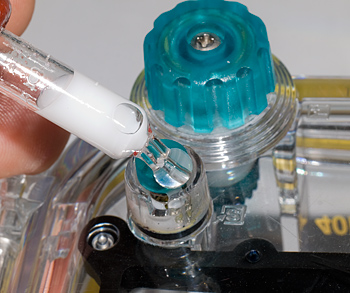
Each control on most Compact & DSLR camera housings have a small slot that allows water to drain from the shaft and ‘O’ Ring. By blowing (with your breath) into this slot (or close to it), any water left after rinsing will be expelled. With many alloy DSLR housings there is no slot for water drainage, but by blowing (with your breath) close to one side of the control, excess water will still be expelled.
Then using a small eye dropper add one drop of the Silicon Pump liquid dropped down into this slot, or run-down the shaft, lubricating the ‘O’ Ring and control shaft.
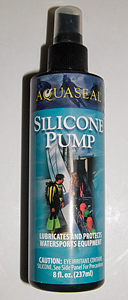
Silicon Pump
|
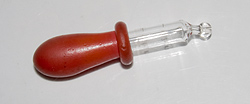
Eye Dropper
|
|


This Silicon Pump is harmless to the black (butyl) ‘O’ Rings used on nearly all camera housings. This includes all acrylic (clear plastic) and alloy compact housings & DSLR housings. Common housings like Nauticam, Olympus, Canon, Ikelite, Fantasea, 10Bar, Aquatica, Subal, Sea & Sea, Seatool, Nexus Anthis & Patima all use normal rubber ‘O’ Rings for their rotating and push button controls.
|
|
|
|
|

|
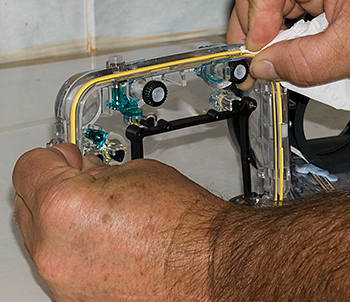
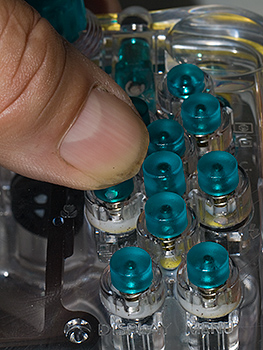
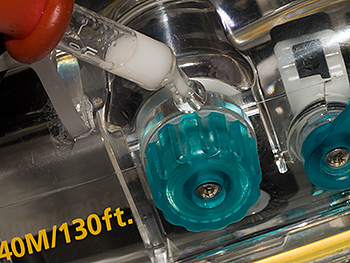
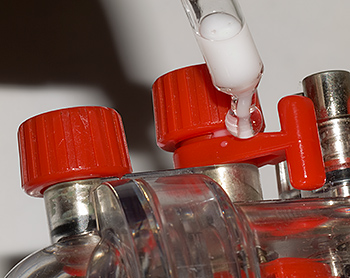
Using the Silicon Pump filled Eye Dropper, squeeze a drop of the liquid onto each control on the housing. Allow it run down the shaft of the control/button, so it reaches the ‘O’ Ring. Push each button and turn the dial of each control after lubricating. Then let it sit for a few minutes. Note: Some controls are difficult to access, you may need to place the housing upside-down to allow the Silicon Pump liquid to run into the ‘O’ Ring area.
DO NOT get any of this silicon lube onto the front lens port or inside the housing. Wipe off any excess drips from the housing and operate the buttons and control dials a few times after lubricating.
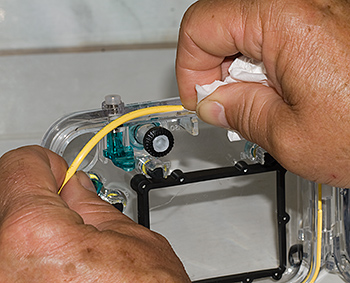
Once all of the shafts and buttons have been lubricated and operated a few times; leave the lubricant to sit for a few minutes, and afterwards shake the housing gently to remove the excess lubricant (Best do this over an old newspaper, rather than your lounge room carpet!).
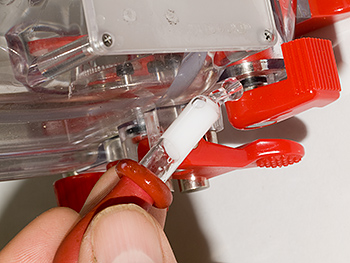
Next remove the main body ‘O’ Ring from the housing. You can use an ‘O’ ring picker (some manufacturers supply their housings with these), a tissue or even an old credit card (with a rounded corner), to remove the ‘O’ Ring.
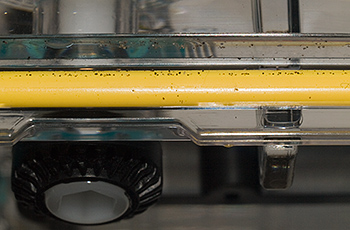
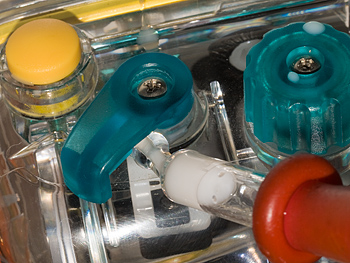
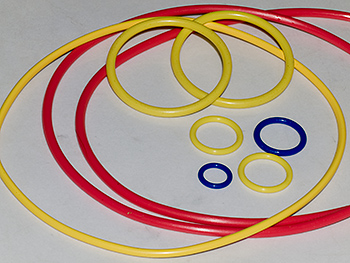
The only ‘O’ Rings that do not benefit from this lubrication are the main body and port ‘O’ Rings, which are sometimes made from silicon rubber which is softer and more pliable. Use only the ‘O’ Ring grease supplied by your housing manufacturer to lubricate these ‘O’ Rings. In almost 99% of housings today, any silicon rubber ‘O’ Rings are generally colored blue, red or yellow. These are the ‘O’ Rings that are lubricated with the manufacturers own silicon, usually supplied in a small tube.
Once all of the shafts and buttons have been lubricated and operated a few times; leave the lubricant to sit for a few minutes, and afterwards shake the housing gently to remove the excess lubricant (Best do this over an old newspaper, rather than your lounge room carpet!).
Next remove the main body ‘O’ Ring from the housing. You can use an ‘O’ ring picker (some manufacturers supply their housings with these), a tissue or even an old credit card (with a rounded corner), to remove the ‘O’ Ring.
The only ‘O’ Rings that do not benefit from this lubrication are the main body and port ‘O’ Rings, which are sometimes made from silicon rubber which is softer and more pliable. Use only the ‘O’ Ring grease supplied by your housing manufacturer to lubricate these ‘O’ Rings. In almost 99% of housings today, any silicon rubber ‘O’ Rings are generally colored blue, red or yellow. These are the ‘O’ Rings that are lubricated with the manufacturers own silicon, usually supplied in a small tube.
|
|
|
Removing the Main O Ring from its groove, push with tissue and hold the O ring at the opposite side of the housing. The O Ring pushes itself out of the groove.
|
Silicon ‘O’ Rings are normally coloured Red, Yellow or Blue. These ‘O’ Rings are made from silcon rubber and should only be lubricated with the silicon lubricant supplied by your housing manufacturer.
|
Place the main body ‘O’ Ring in a small zip-lock plastic bag,
this will protect while being stored. |
Place the plastic bag with the ‘O’ Ring enclosed inside of the housing. This way you won’t forget to install it before putting in the camera again.
|
If the main body ‘O’ Ring is left continuously in-place in the housing with the rear door closed it is constantly under pressure and eventually loses its shape. It is no longer round, but slightly flattened. This reduces the ‘O’ Rings ability to seal against the housing. Once removed, the ‘O’ Ring should be cleaned (see Pre-Dive Maintenance above) and put in a plastic zip-lock bag and placed inside of the camera housing, this way you can’t forget to install it next time you dive, as the camera won’t fit the housing with the bag inside!
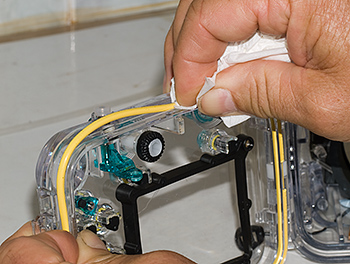
Clean the ‘O’ Ring groove with a tissue to remove
any water and sand/ dust particles and close the
back of the housing (with the ‘O’ Ring inside, in a bag).
any water and sand/ dust particles and close the
back of the housing (with the ‘O’ Ring inside, in a bag).
Long Term Maintenance
Long Term Maintenance should be carried-out every year. Contact your housing and strobe manufacturers or your underwater photography retailer and ask when they recommend that the control ‘O’ Rings should be replaced or any other maintenance they recommend for your housing or strobe.
Following these simple steps will go a long way to helping your camera and housing last for many years.
